Now it’s time to get off the xb12 from the paddock stand – fork and front wheel installation!
Related posts:
These are the tools:
- 1/4 HEX
- 5/16 HEX
- 22 HEX (metric)
- 22 NUT (metric)
- plastic wedge
- torque wrench
- anti seize
- Loctite 271
Terms and conditions: All work at own risk, NO warranty in ANY case of damage!
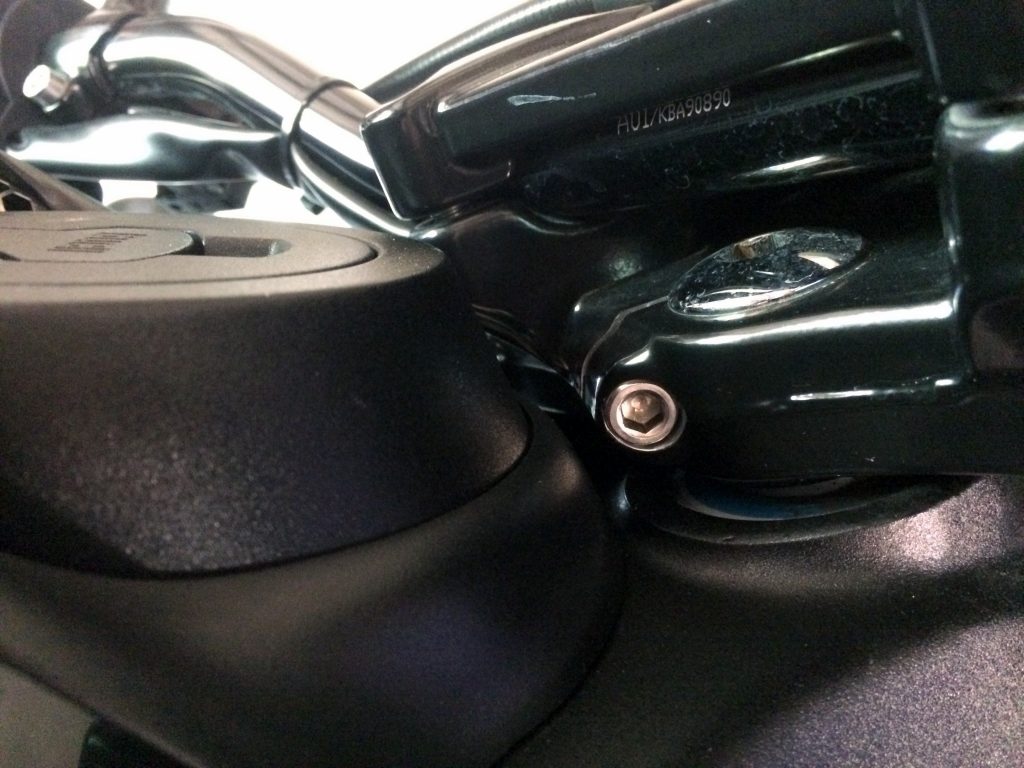
STEP 1
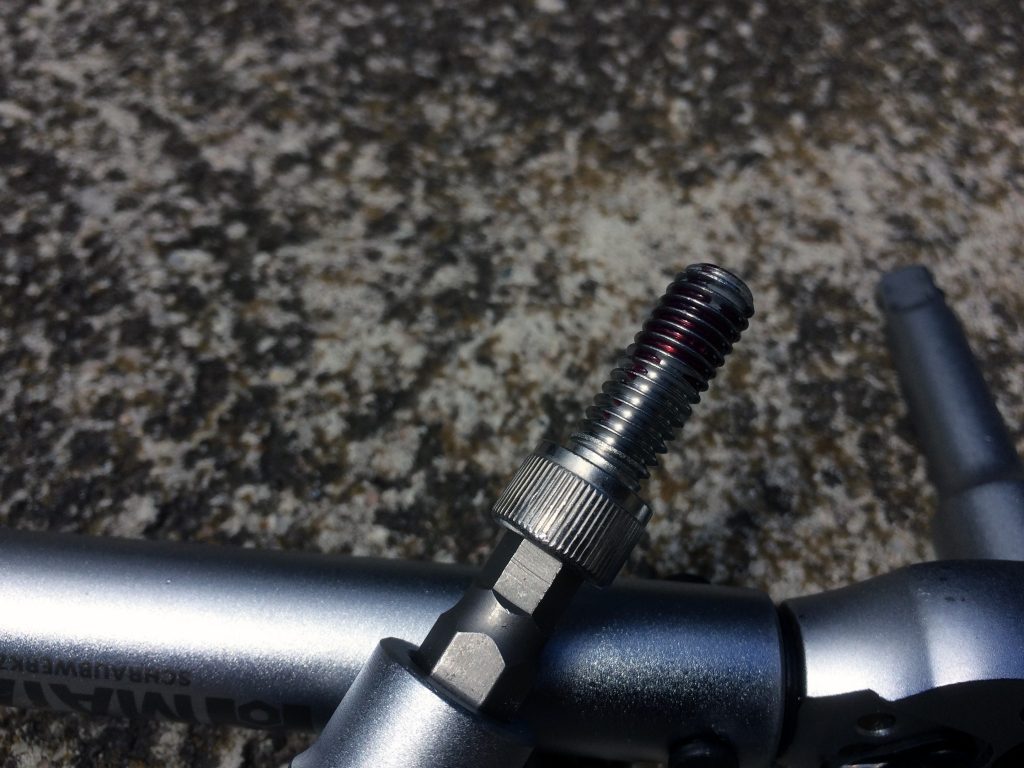
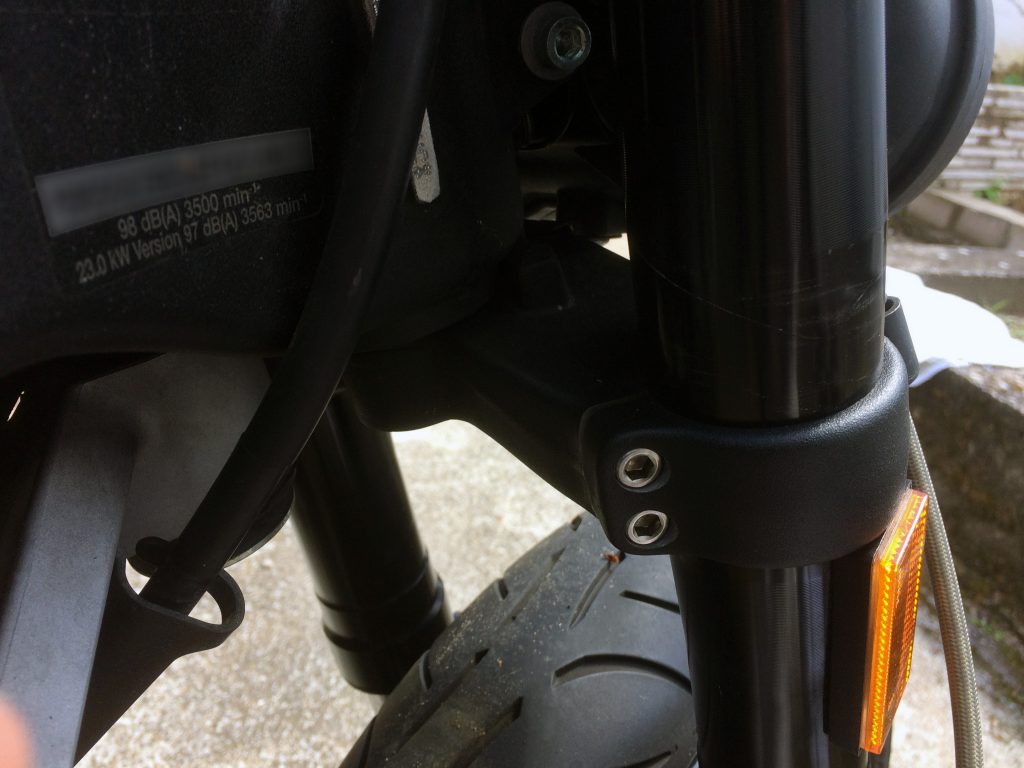
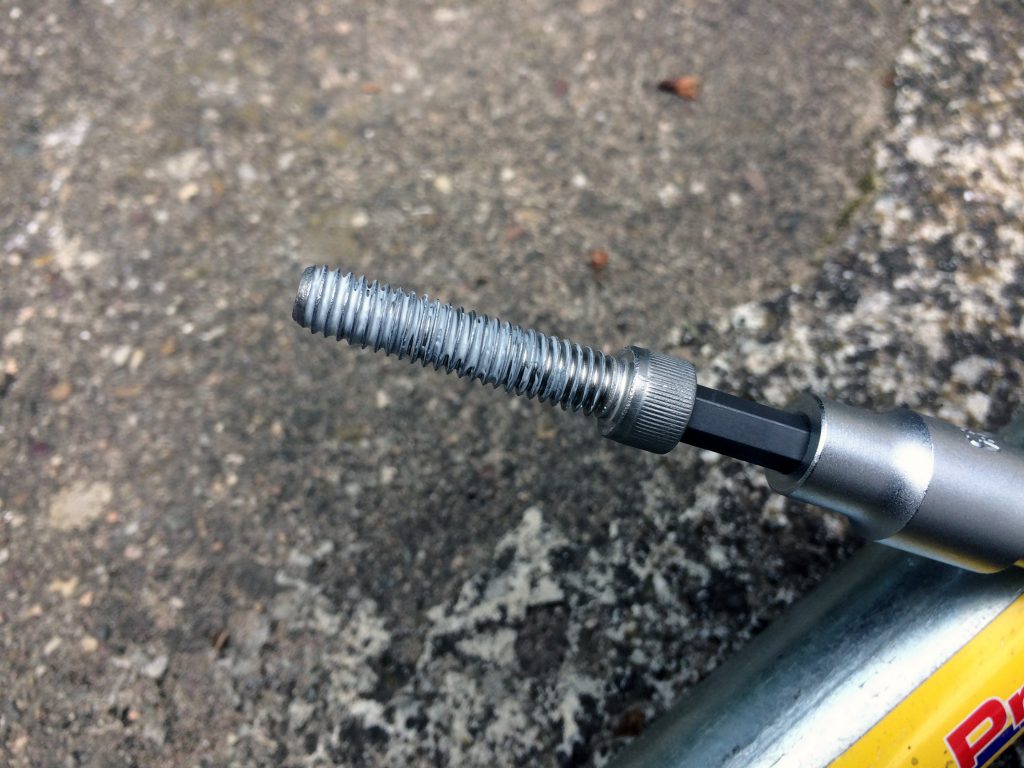
As announced I also switch to stainless screws in this section. Therefore the first one is the fork clamp on the upper triple tree. Unscrew it with a 1/4 HEX and insert the replacment with some Loctite 271 RED on 27,1-29,8 NM.
STEP 2
First is to spread the clamping a little bit for a better assembly (plastic wedge). Then guide the fork thru the lower triple tree and pull over the snap-ring into the notch. After that continue into the upper one until the ring is overlapped.
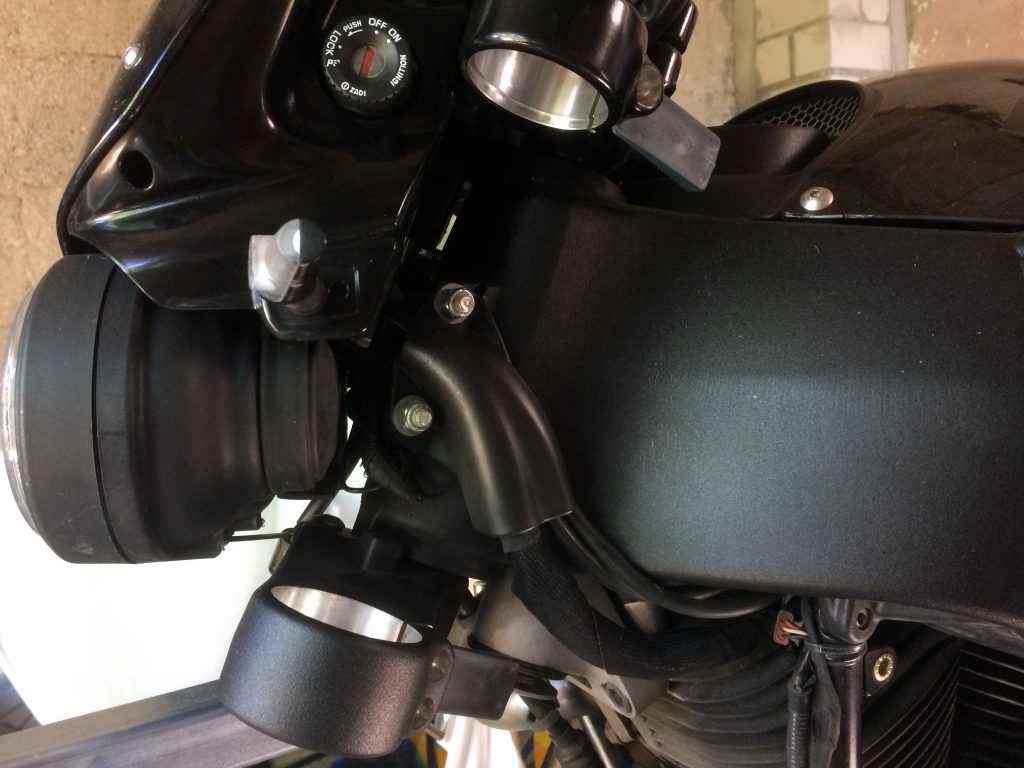

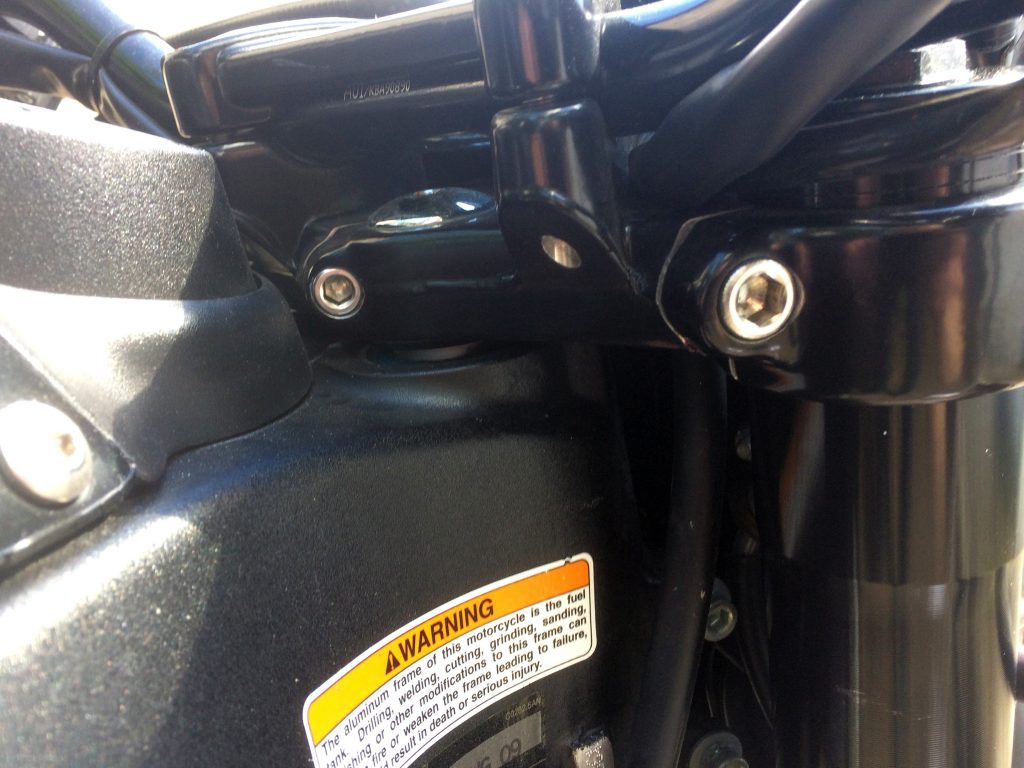
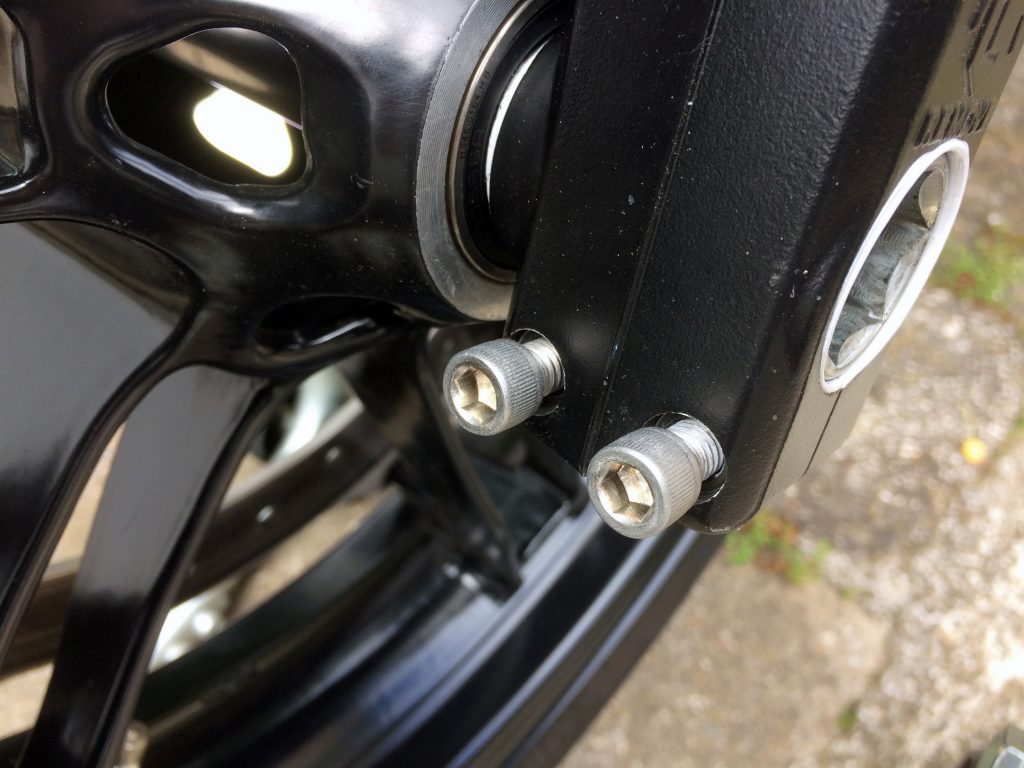
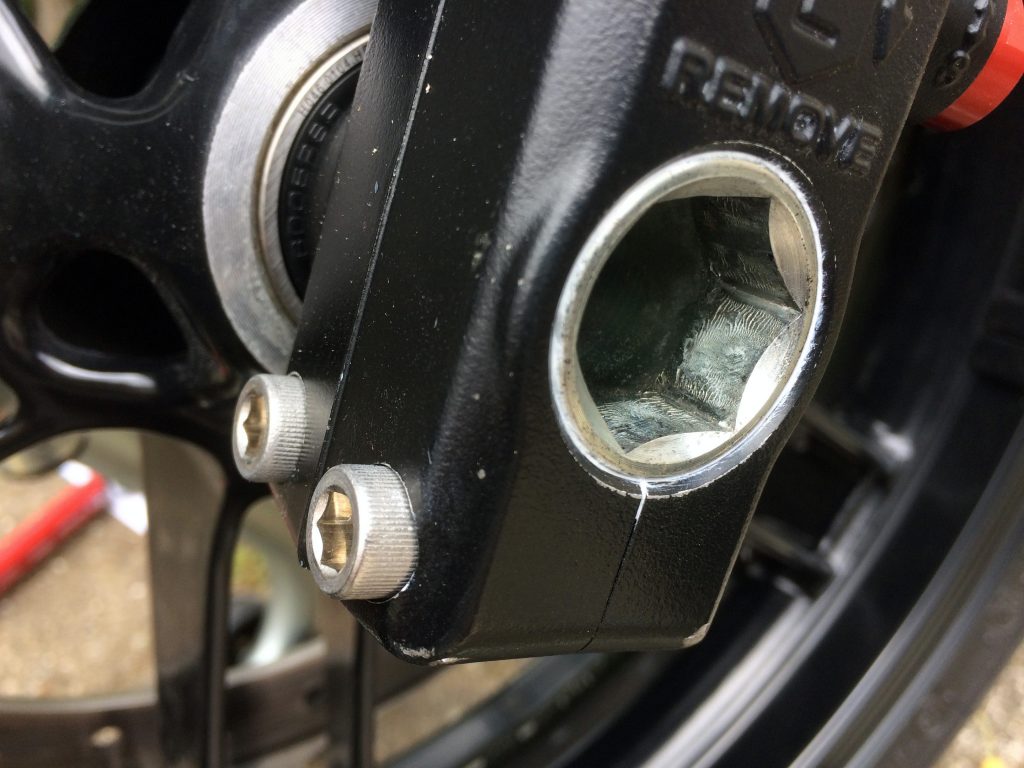
To align the fork take a look at the two notches over the upper clamp. Also to the reflector which should be pointed to the outside. Remove the wedges and install the upper screws (without Loctite) with the 5/16 HEX to 31,2-33,9 NM. After that the lower ones with the 1/4 HEX a bit more than hand tighten. Same on the opposite side. Check the correct alignment with an installed axle (no anti seize needed).
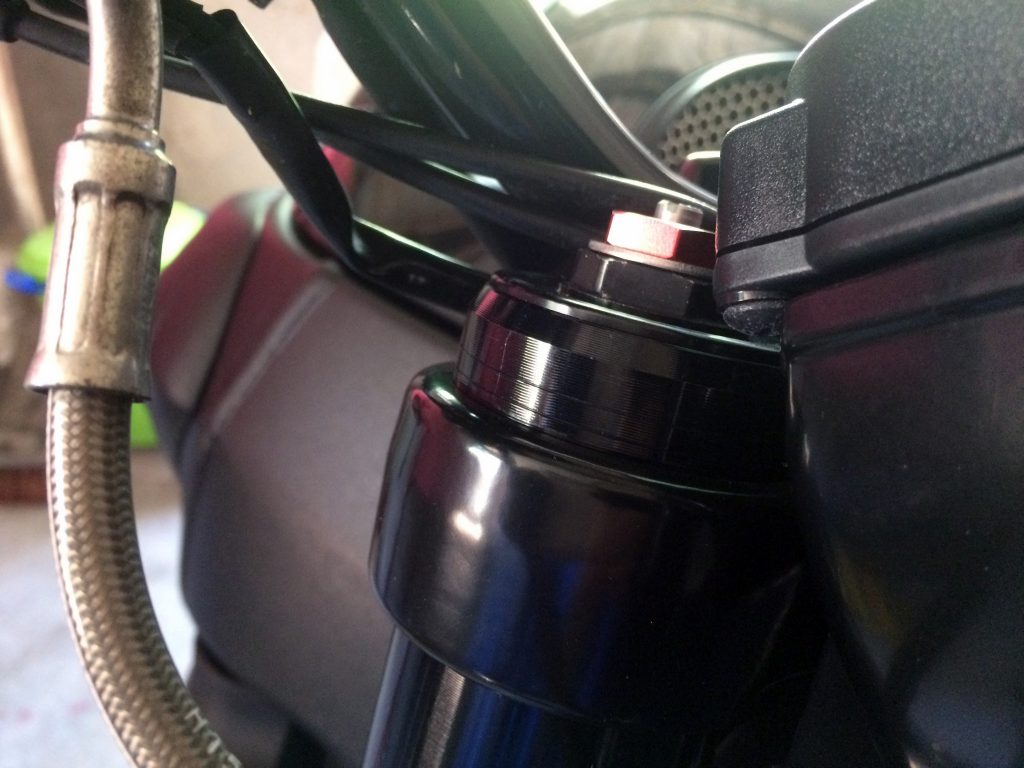

STEP 4
This step is not documented inside the official manual but I do this just to prevent tensions on the fork.
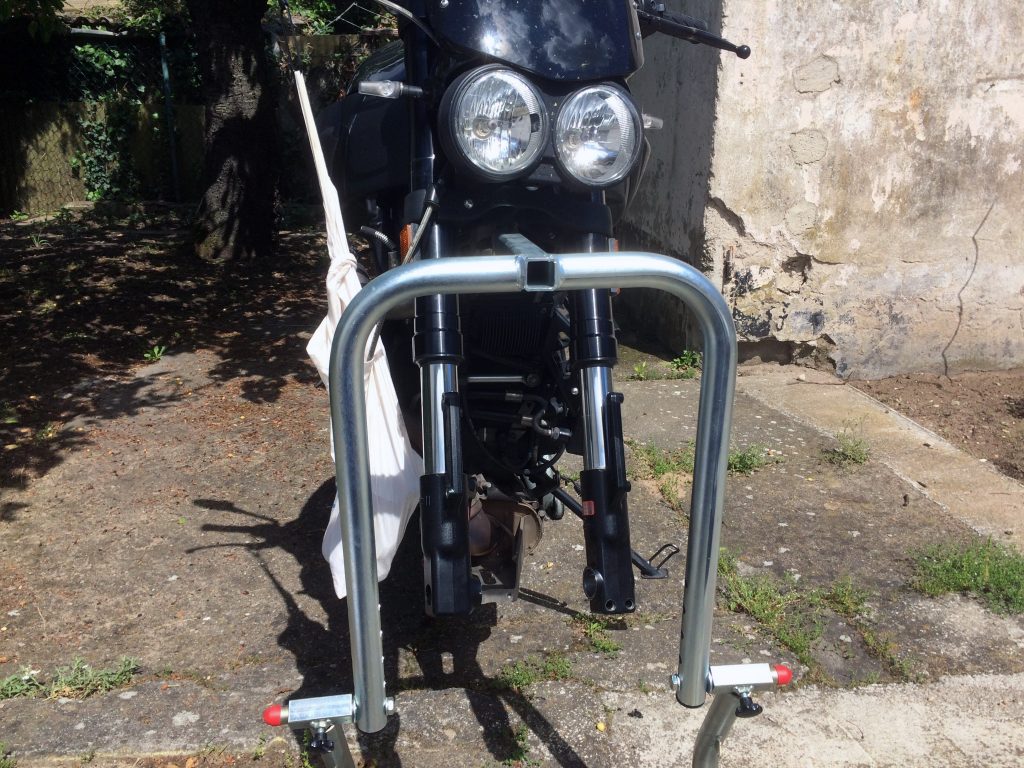
Install the front wheel loose without anti seize on the axis. Then lower the bike from the paddock stand and move it to a wall or something.
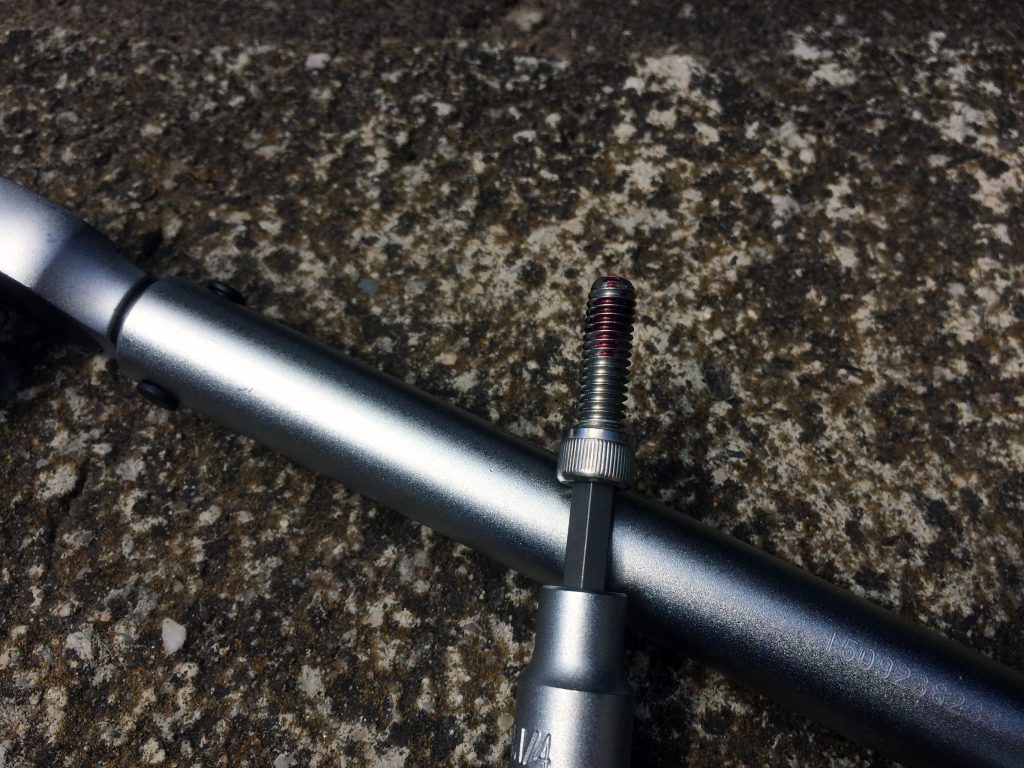
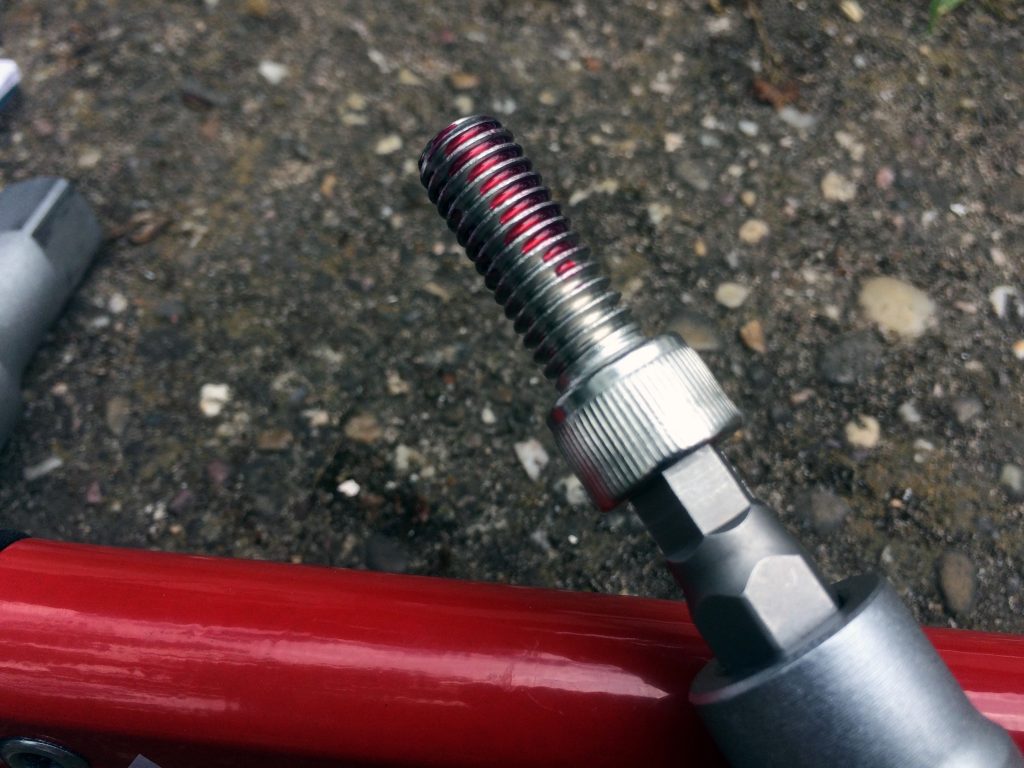
First unscrew the upper screw on one side, attach Loctite 271 RED to it and hit it again with 31,2-33,9 NM – then the opposite side.
After that just loosen the two lower ones on each side (just a bit), face the front wheel to the wall and perform a little one, two dipping’s of the fork. Then you can apply Loctite 271 RED to the two lower screws and tighten them with 27,1-29,8 NM (both sides).
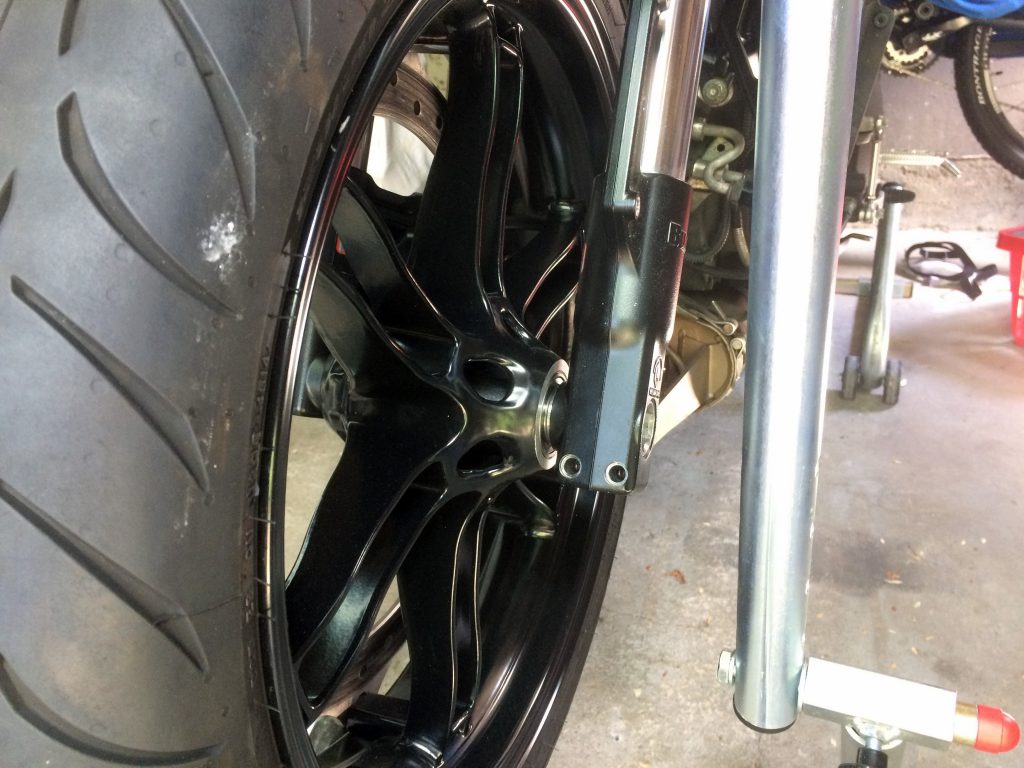
STEP 5
Now back on the paddock stand and remove the front wheel again.
STEP 6
Now you can also follow this guide (Front Brakepads at STEP 10) or just keep on this one.
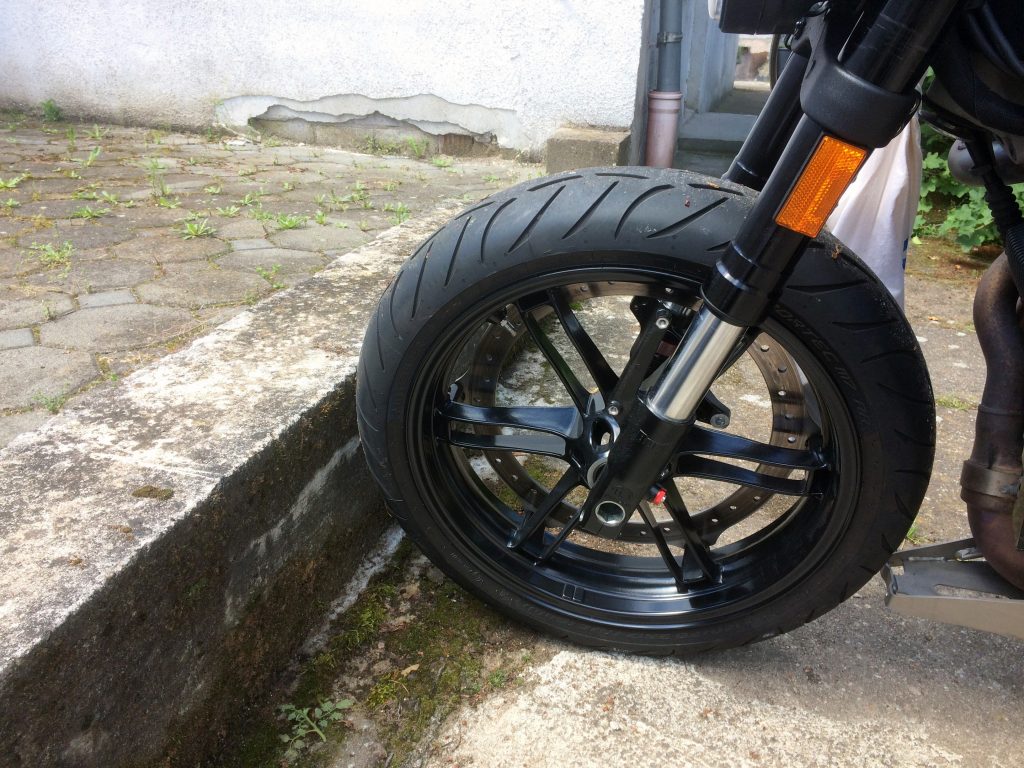
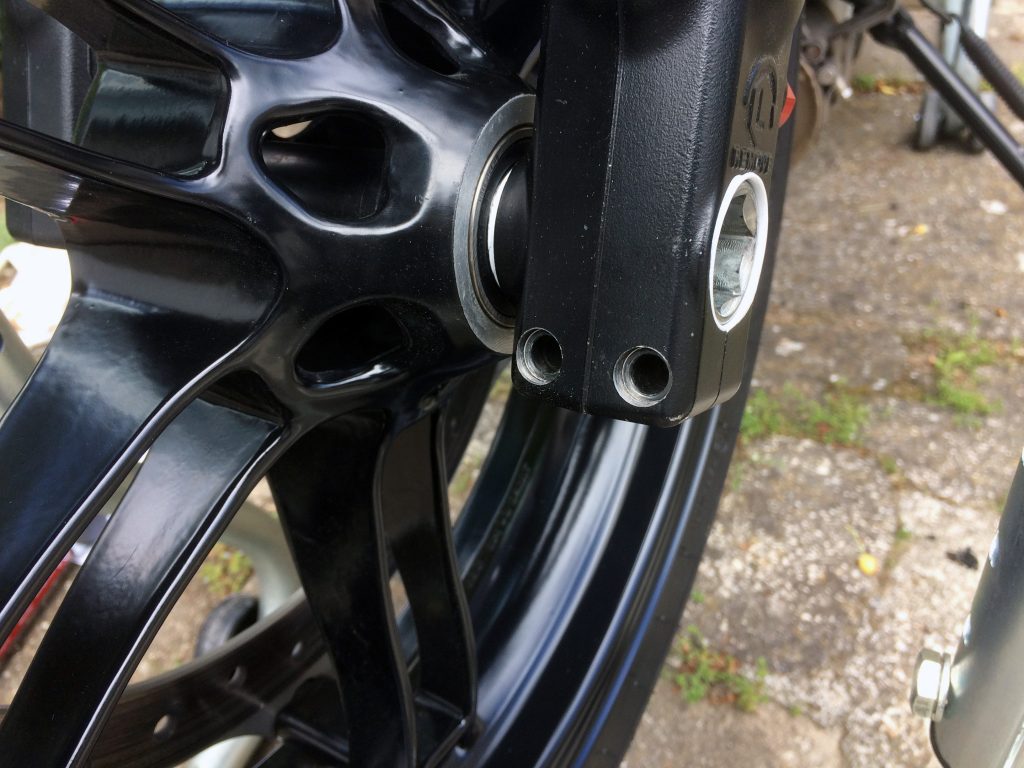
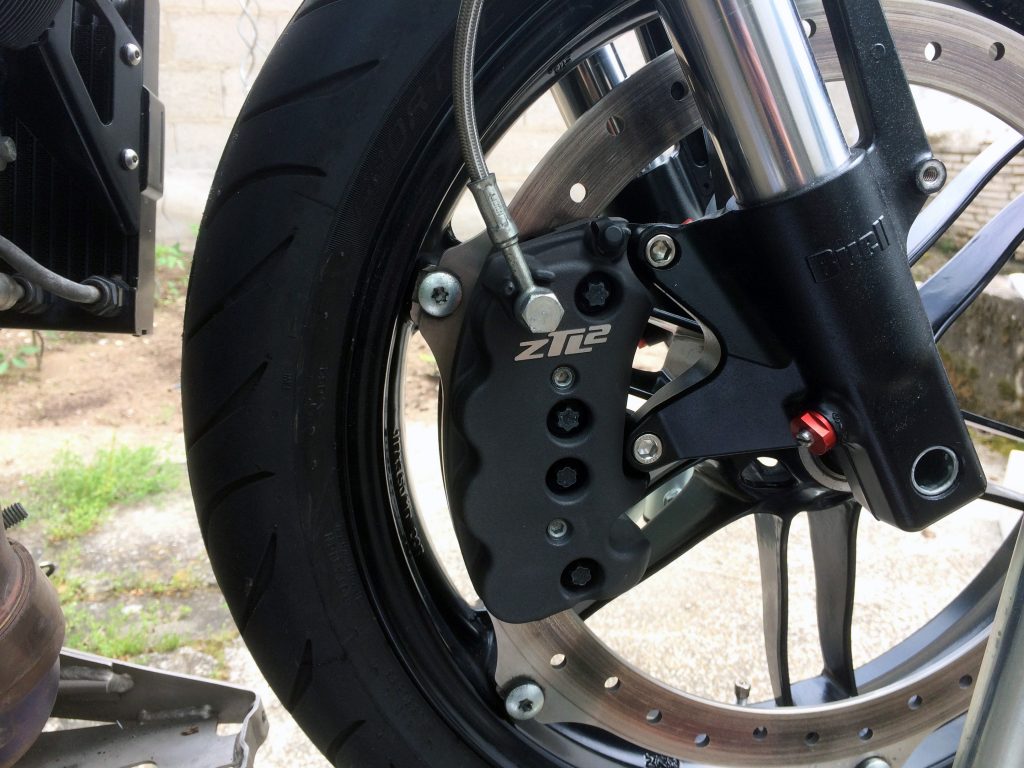
First cover the axis with anti seize. Then place the front wheel between the fork and slide the break caliper over the rotor. Tighten the left threaded axis to 52,9-55,6 NM (22 metric HEX) and lock it with the two axis pinch fasteners 27,1-29,8 NM (1/4 HEX) – mine as expected stainless steel therefore also some anti seize on the pinch fasteners.
STEP 7
Apply some Loctite 271 RED to the fasteners of the break caliper torque them with 47,5-50,2 NM.
Last things are the air scoops, the fender and the chin fairing, now bing deal.